Let's Constellate tutorial
This is a step by step tutorial of how to use Let's Constellate.
You may want to watch the live demo with questions and answers.
And/or scroll down for step be step tutorial.
You can move between the tutorial and the Let's Constellate on your browser.
May the Constellation be with you!
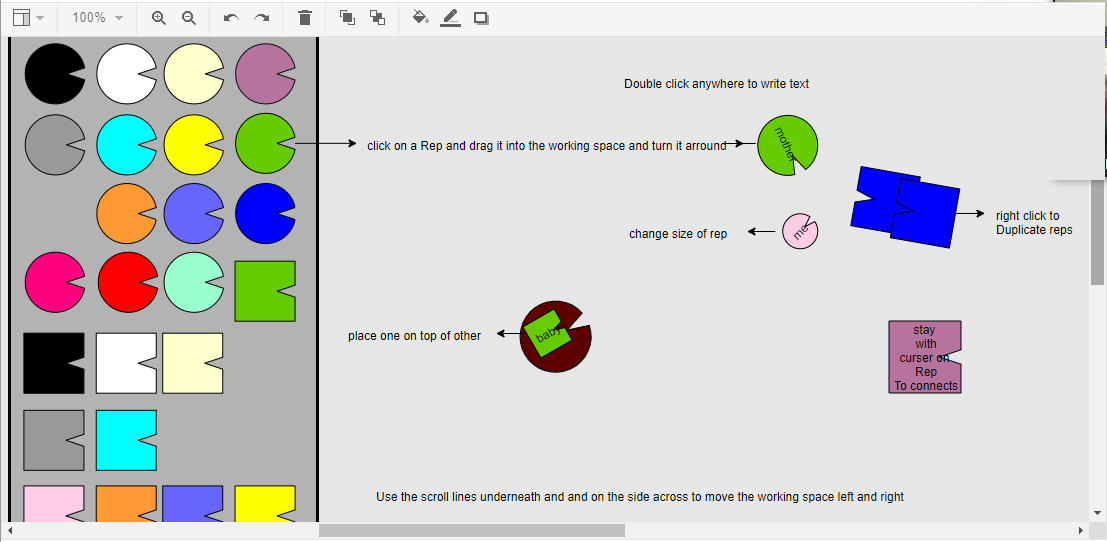
Feel free to try all these option once you are in the session.
Below we will explain to you step by step how to Constellate with:
Let's Constellate!
Step by step tutorial. Tips to follow
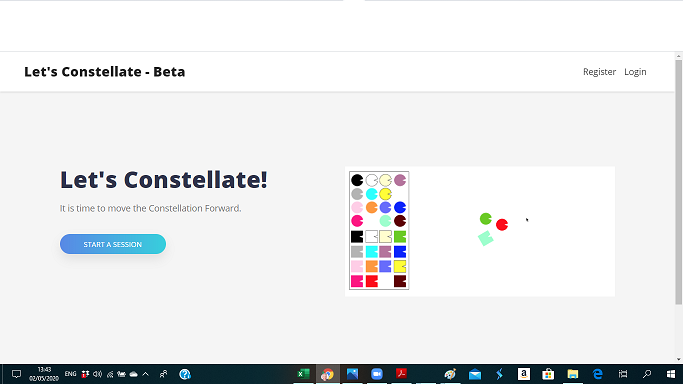
First time visitor? Click Register on top right!
If you have registered before, click START A SESSION or LOGIN.
If you have registered before, click START A SESSION or LOGIN.
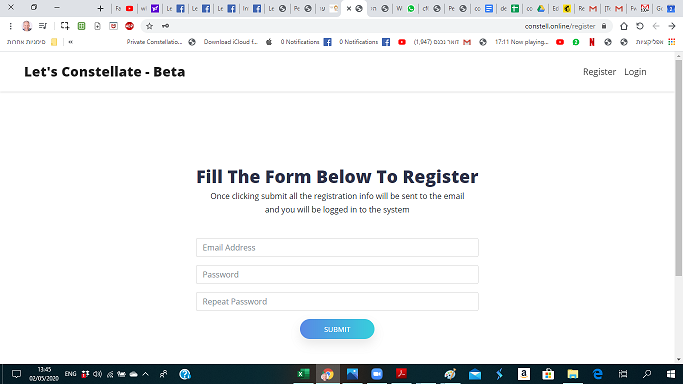
Enter your email address in the email box.
Create and enter a password in the password box
Enter password again in the Repeat Password box.
Click the SUBMIT button
Create and enter a password in the password box
Enter password again in the Repeat Password box.
Click the SUBMIT button
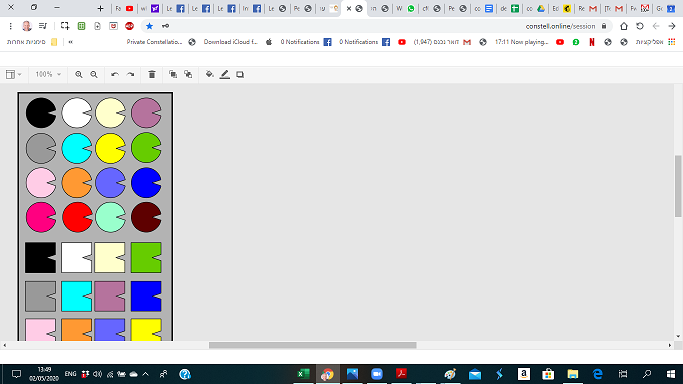
Hooray!!! you are ready to start constellating on line.
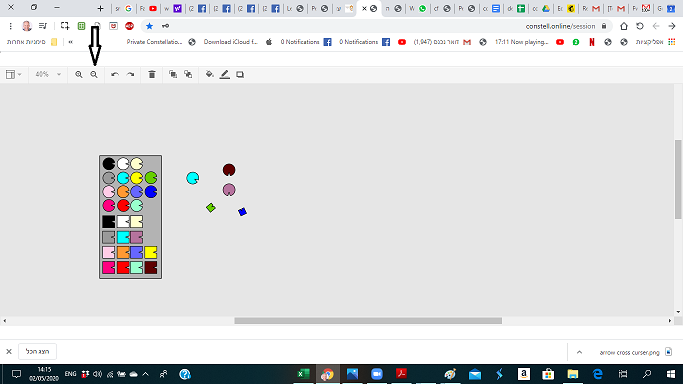
Zoom in & zoom out:
At any point during the session you can zoom in or out by clicking on the magnifying glass symbol.
go ahead and try it.
At any point during the session you can zoom in or out by clicking on the magnifying glass symbol.
go ahead and try it.
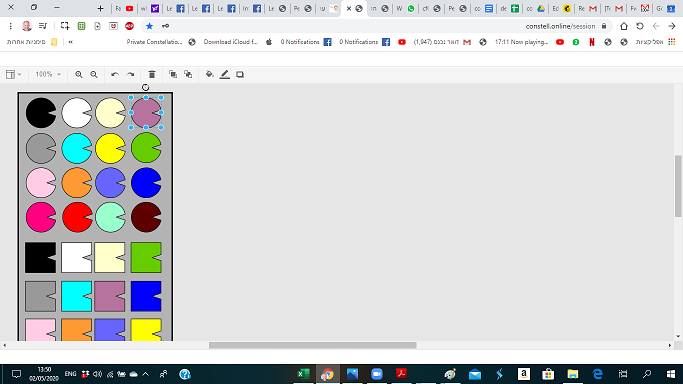
Select a Rep (representation) by clicking on it.
Once selected 8 blue dots will appear around the rep.
Above the Rep will appear the Rep turning symbol
(a small arrowed circle).
Once selected 8 blue dots will appear around the rep.
Above the Rep will appear the Rep turning symbol
(a small arrowed circle).
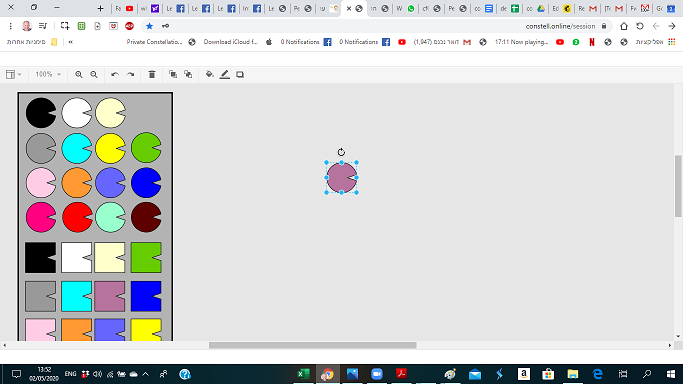
To drag a Rep into the constellation space,
all you need to do is select a Rep by clicking and dragging it out of the box.
Now you can see clearly the 'Rep turning symbol' on top of the selected Rep.
all you need to do is select a Rep by clicking and dragging it out of the box.
Now you can see clearly the 'Rep turning symbol' on top of the selected Rep.
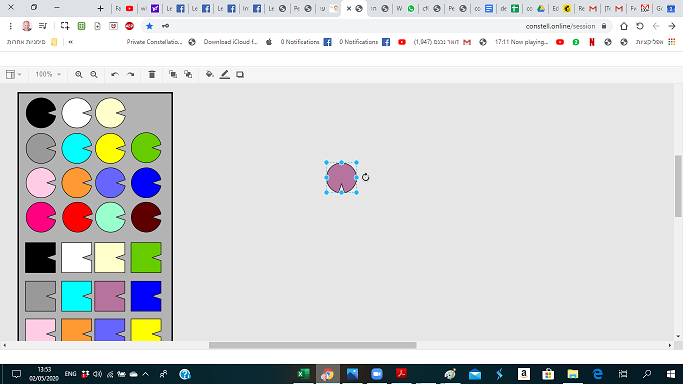
Turning the Rep arround:
Slect the Rep you want to turn.
Once selected the little 'Rep turning symbol' will appear.
Click and drag in a circle motion the 'Rep turning symbol'
until you are happy with the direction the Rep is facing.
Slect the Rep you want to turn.
Once selected the little 'Rep turning symbol' will appear.
Click and drag in a circle motion the 'Rep turning symbol'
until you are happy with the direction the Rep is facing.
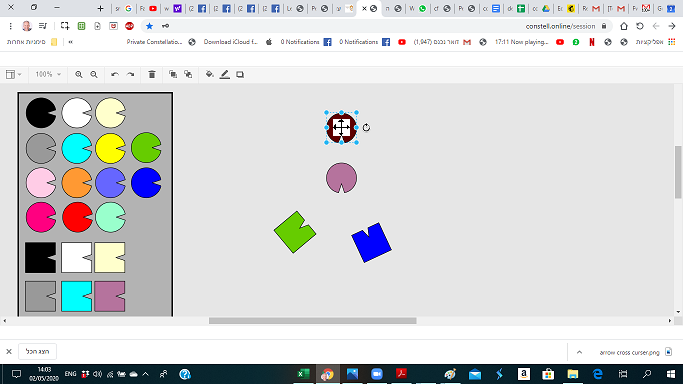
Conneting to rep:
Here is where the magic of the Constellation starts!
Add more Reps as necessary for your Constellation,
and turn them to face the direction they want to face.
Select the Rep you wish to connect to, and leave the arrowed cross on it.
(with ipad or tablet you may do it by placing your finger on it)
You may want to close your eyes to begin with, and if you have participated in Constellations before
You will find this a very natural transition.
If it is your first time, it will be helpful to have a Constellations experienced person to guide you.
Here is where the magic of the Constellation starts!
Add more Reps as necessary for your Constellation,
and turn them to face the direction they want to face.
Select the Rep you wish to connect to, and leave the arrowed cross on it.
(with ipad or tablet you may do it by placing your finger on it)
You may want to close your eyes to begin with, and if you have participated in Constellations before
You will find this a very natural transition.
If it is your first time, it will be helpful to have a Constellations experienced person to guide you.
More options:
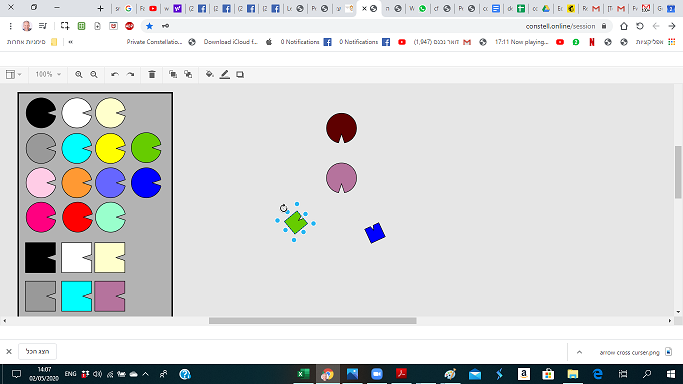
Changing the size of the Rep:
Select the Rep by clicking on it.
click on of one of the blue dots that appear around it
and drag them in to make Rep smaller or out to make it larger.
Select the Rep by clicking on it.
click on of one of the blue dots that appear around it
and drag them in to make Rep smaller or out to make it larger.
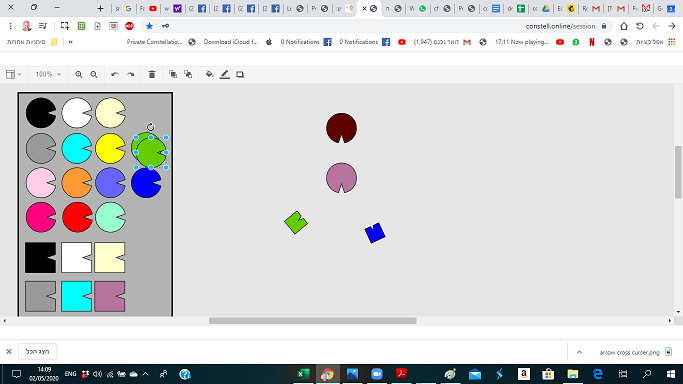
Duplicating Reps:
Select a Rep by clicking on it.
In your keyboard press 'CTRL D'
or right click on the Rep and selct 'Duplicate'.
Select a Rep by clicking on it.
In your keyboard press 'CTRL D'
or right click on the Rep and selct 'Duplicate'.
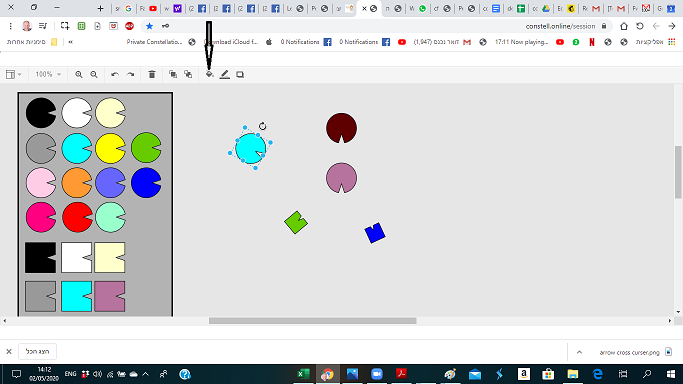
Change the Rep's color:
Select the Rep you want to change its color by clicking on it.
Go to the top menue and click the 'fill color symbol'.
The color pallet will appear.
Chose the color you want and click apply.
Select the Rep you want to change its color by clicking on it.
Go to the top menue and click the 'fill color symbol'.
The color pallet will appear.
Chose the color you want and click apply.
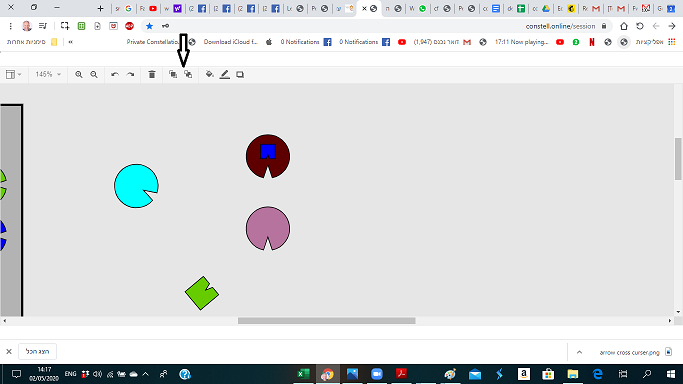
You may want to place one Rep on top of the other, like mother and child for example.
Drag the Rep you would like to place on top or under the other and position it on another Rep.
It will automaticaly appear either on top or under the other.
To change this go to the menue on top and click 'To front' or 'To Back'.
It will automaticaly appear either on top or under the other.
To change this go to the menue on top and click 'To front' or 'To Back'.
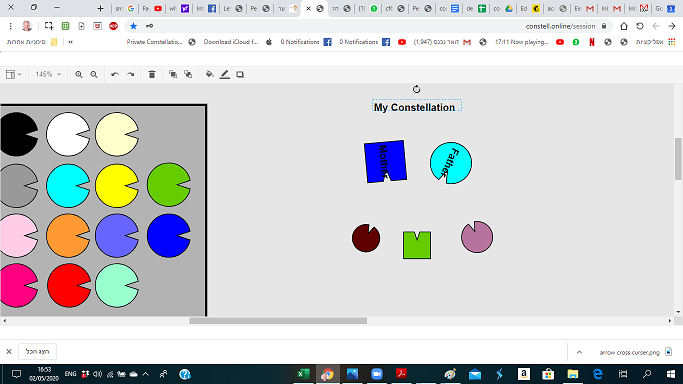
Inserting Text:
You can double click on a Rep and give it a discription. The text will stay attached to the Rep.
Or, double click any were on the board to open a text box.
Note:
You can change font size like in word document. Highlight and change size.
Changing the font color - coming soon.
You can double click on a Rep and give it a discription. The text will stay attached to the Rep.
Or, double click any were on the board to open a text box.
Note:
You can change font size like in word document. Highlight and change size.
Changing the font color - coming soon.
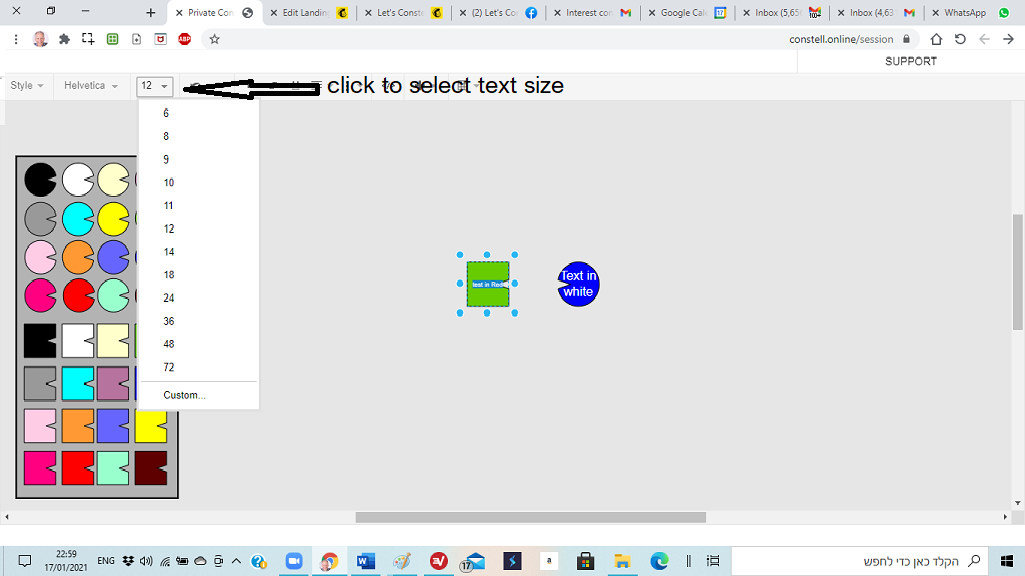
Changing text size
To change text size highlight the text by double click.
Text menu will appear on top.
Open the text size drop down menu and select the size you want
To change text size highlight the text by double click.
Text menu will appear on top.
Open the text size drop down menu and select the size you want
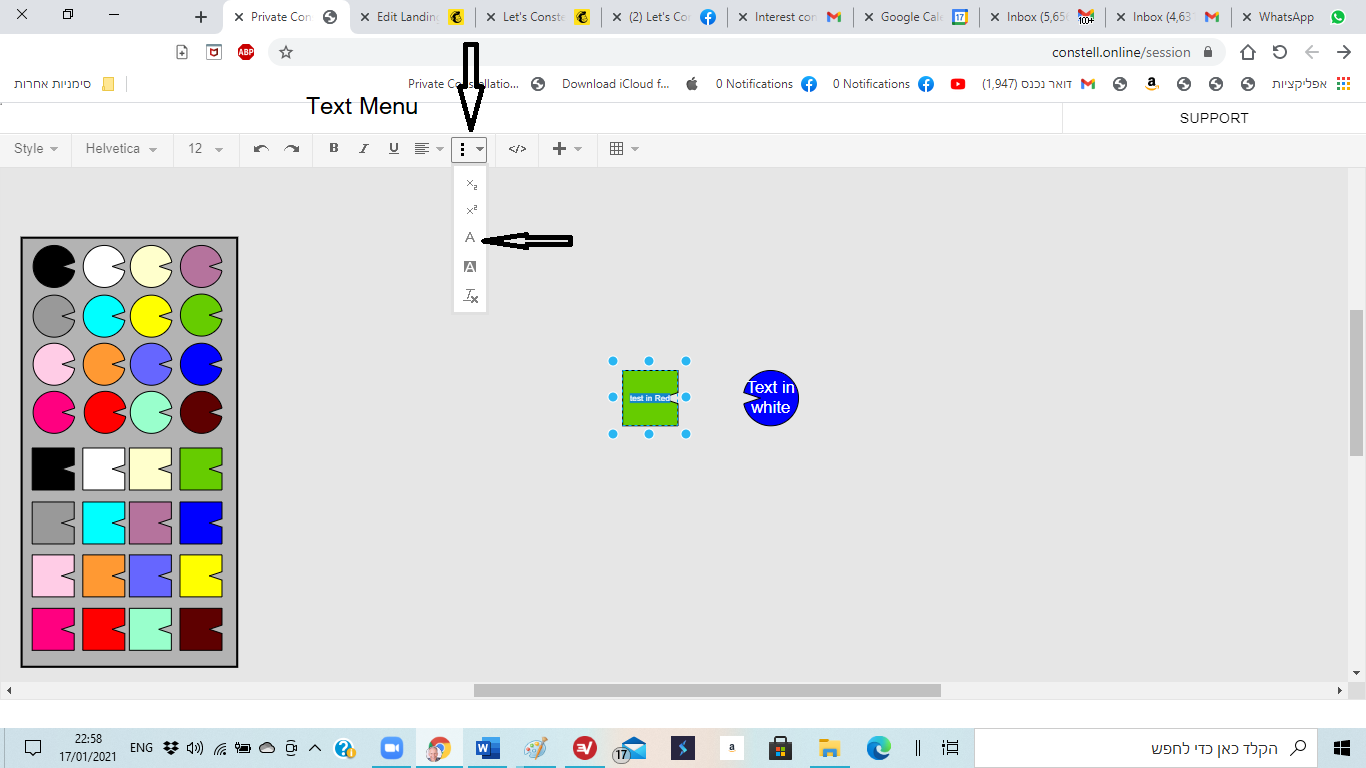
Changing text color
Select the text you want to change color.
by double clicking on the text, the text menu appears.
Click on the colour bucket to open the colors optiions.
Double click on the color you wish your text to be in.
Select the text you want to change color.
by double clicking on the text, the text menu appears.
Click on the colour bucket to open the colors optiions.
Double click on the color you wish your text to be in.
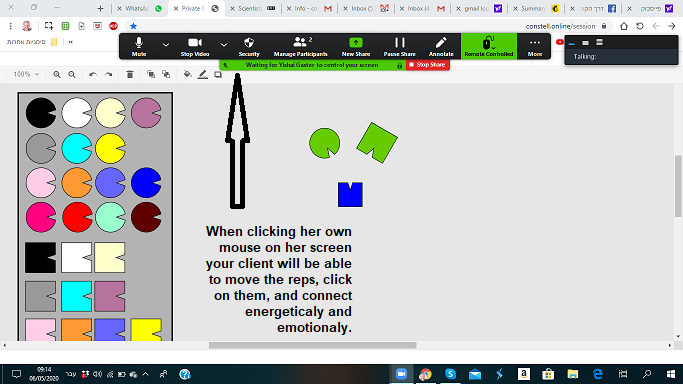
Giving remote access to clients on zoom:
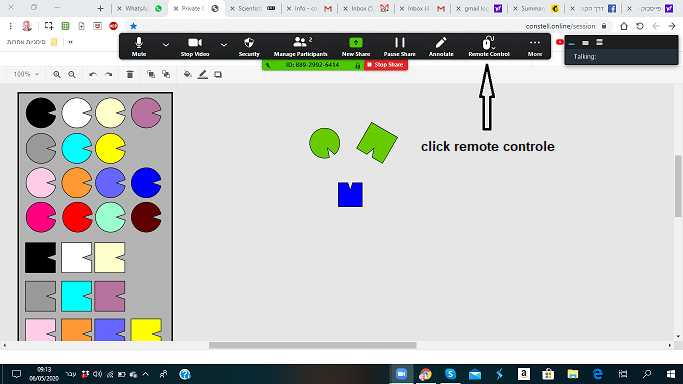
This screen will appear once you have clicked SHARE
on the bottom menue of your Zoom screen.
find the Zoom menu on your shared screen,
as in this photo, and click the 'Remote Control'.
This screen will appear once you have clicked SHARE
on the bottom menue of your Zoom screen.
find the Zoom menu on your shared screen,
as in this photo, and click the 'Remote Control'.
Giving permission for remote control:
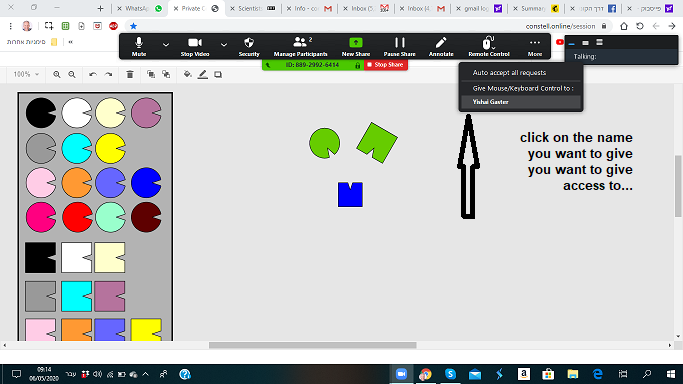
Once you have clicked the Remote Control button this menu will appear.
You can select who you want to give remote control by clicking their name,
or, click 'Auto Accept All Requests' if you have more then one client.
Once you have clicked the Remote Control button this menu will appear.
You can select who you want to give remote control by clicking their name,
or, click 'Auto Accept All Requests' if you have more then one client.
Confirmation of permission to remote access:
Once you have clicked on your choice for giving remote control,
a green confirmation will appear,
'Waiting for client to control your screen'.
Once you have clicked on your choice for giving remote control,
a green confirmation will appear,
'Waiting for client to control your screen'.
Client's view:
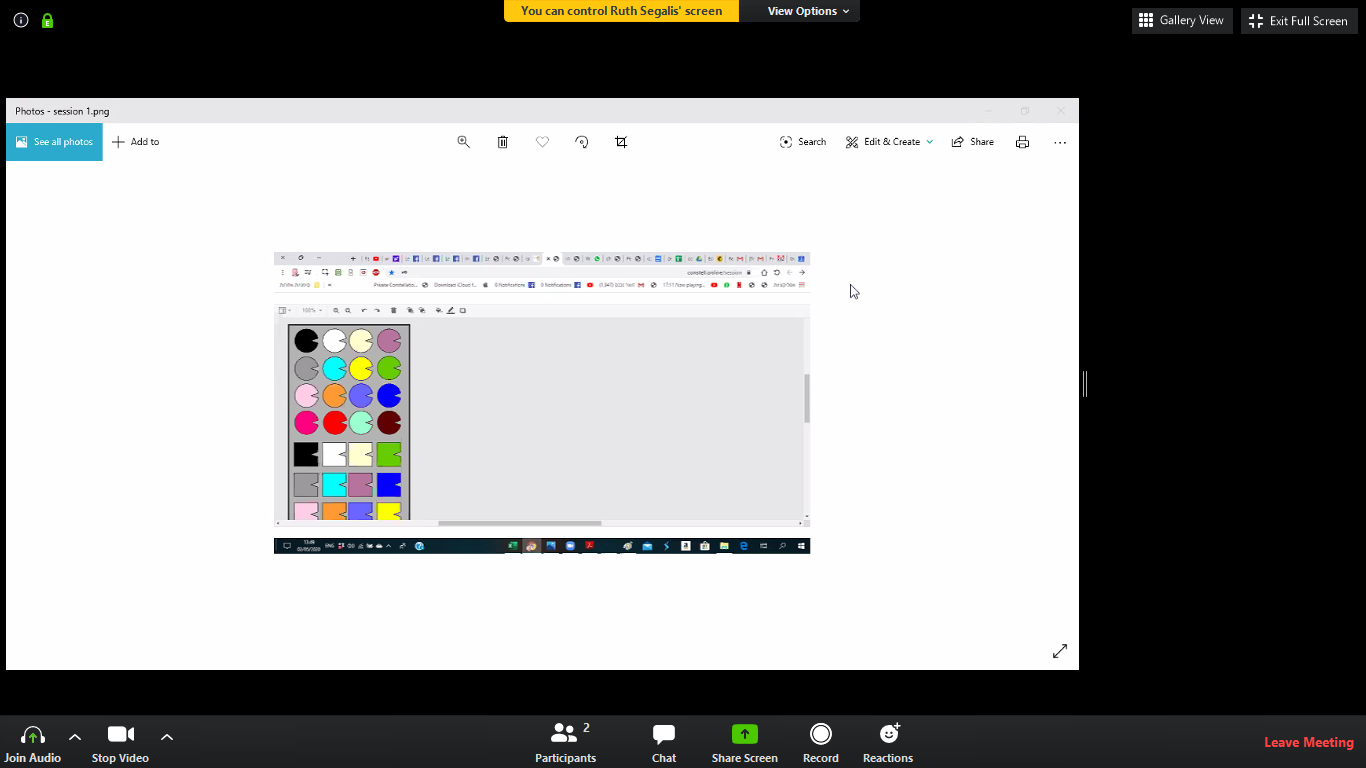
This is your client will see.
An orange box confirmation that she can control your screen.
This is your client will see.
An orange box confirmation that she can control your screen.
Client's screen:
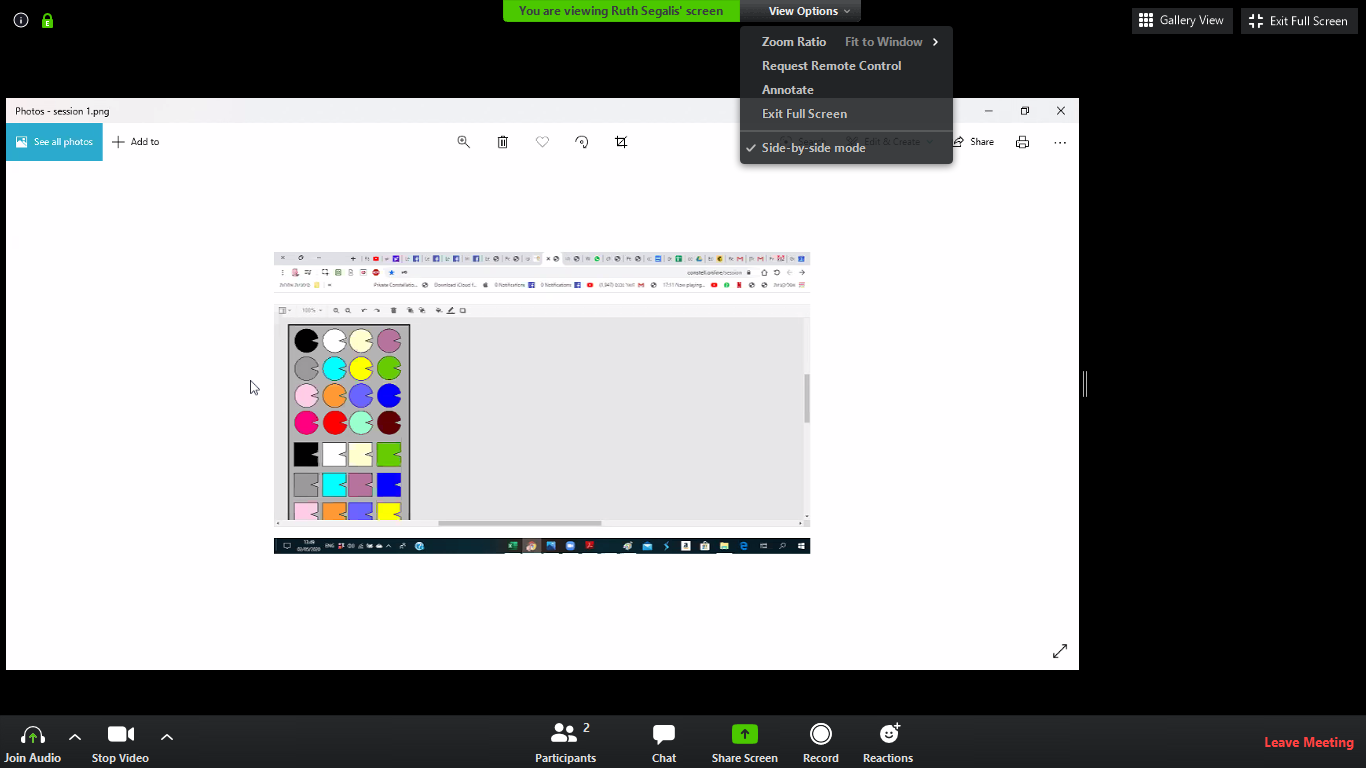
Once you have shared your screen,
your client's can request Remote Control by clicking 'View Options'.
Once you have shared your screen,
your client's can request Remote Control by clicking 'View Options'.
Some notes on screen sharing and remote control with Let's Constellate:
- Sharing with Zoom Remote Control isn't always smooth, some times there are slight delays in reaction.
- If you can not click and drag in Remote Control it is because your computer security is blocking Zoom.
- You will need to allow zoom to Remote Control on your computer security settings.
Contribute to Let's Constellate:
Let's Constellate is a free online systemic Constellations פrogram created for the advancement of human potential.
It requires frequent maintenance, love and care, and is hoping to develop and give more value and options to you, to your work and to your clients.
If you would like to support us in doing this we would greatly appreciate any contribution you can give.
Here are some options:
Let's Constellate is a free online systemic Constellations פrogram created for the advancement of human potential.
It requires frequent maintenance, love and care, and is hoping to develop and give more value and options to you, to your work and to your clients.
If you would like to support us in doing this we would greatly appreciate any contribution you can give.
Here are some options: